
Hullo, Sandy Bear here. Today, I am going to give an introduction to the New and Improved Blogger... although some jury members are still not sure about the "Improved" part. This little bear is not a big fan of change and... has been struggling a bit with aspects of the New Blogger.
Blogger says that "In late June, the new Blogger interface will become the default for all users. The legacy interface will still be optionally available. We recommend trying the new interface by clicking 'Try the New Blogger' in the left-hand navigation."

Given that the "Legacy" version is going to go poof at the end of July, I thought it best to bite the bullet and wade through the worst of the "getting-to-know-you" stage with New Blogger. I thought I would share some of my tips and tricks with you... as well as pitfalls to be avoided.

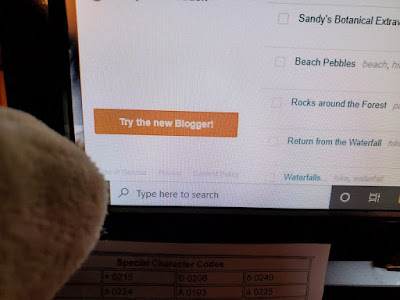
Righto... First step... don't panic or get impatient... I will walk you through the worst of it. Second step... Click on the bottom left of the navigation screen where a friendly orange button says "Try the New Blogger"...
This screen will pop up... click continue...

At this point, things will look beary different! Remember... don't panic!


Now... how to make a new blog post... it used to be up at the top... well, now it's in the bottom right hand corner and is just an orange circle with a plus sign in it... not the most intuitive location...

Now... in the list of blog posts... there comes a point, where things are Scheduled (see the More Sherlock Mail blog) and then there is Published (A Morning Meadow Hike). The Draft one is labeled with yellow... I don't quite like this as much as the old version. It seemed easier to distinguish between Published and Scheduled...


Getting Started
Open up a new blog post... or a draft one... and you'll see that the menu has changed a bit. I liked it with colours in the old one but... oh well.

I make sure my window is wide, otherwise... some of the menu options get lost in the three vertical dots section...

Now, I generally start a blog post by putting in all of my pictures first... click on the picture icon and then click "Upload from Computer"

Then you'll see a screen with a cloud and a blue label that says Browse... click on that and select all the pictures you want to upload... you will see a blue line moving across the screen... and then it disappears...


Photo & Text Wrapping
 |
| This picture was uploaded and then dragged |
Now here's the yucky part... while it was easy to drag pictures around in Legacy Blogger... and easily align them on the left or right hand side of the page, if that's what you wanted... this is not so easy in the New Blogger.
The text will not wrap properly around the pictures which means things end up looking beary goofy...
It seems to work better if the text is all there and you then pop the pictures into specific locations. But that is a goofy way of doing it. There have been lots of complaints about this on the Google Forums so hopefully they fix it...
Huh... I just tried the picture at the left... dragged it and it looked goofy... added a caption... it centred itself... I clicked to left align and voila... the text flows around it... grumble...
 |
| A tiptoe around Toggle Caption |
I think it might be a bit of trial and error... there are two things to keep in mind... the left/center/right/justified commands in the menu aren't the only ones to work with... when you click on an image, it also has some options...
See... there are Left/Centre/Right commands on the menu as well.
The - and + signs make the pics bigger or smaller. You can also do that by clicking the pencil for the old Small, Medium, Large, X-Large, etc. I have found that two clicks of the plus sign make the pics nice and big without being too big. The X-Large is still too wide for my blog posts...
You also need to toggle the caption - it's not an automatic thing anymore - it's the last option no that picture menu...
Here's the thing... when you click "Toggle Caption"... the text alignment all goes to heck in a handbasket... and you might need to click Toggle Caption twice... and realign the picture afterwards... It's a trial and error thing. If you only click Toggle Caption once... the alignment goes to heck... and if you then click on the alignment (Left/Centre/Right) your picture will flip to the top of the blog... better to click Toggle Caption again... and just type in a space or something... Then click the photo again and align it... so far has worked...
Sometimes it also works to type in all the text with the centered pics and then go through later, left align them and then move them... Agh!!!
See... this was a goofy picture alignment... but adding a caption helped. I have also noticed that if you try to use the alignment keys on the main menu... and then the ones on the picture... you can get odd effects... like the picture will flip up to the top of the blog and seemingly disappear....
 |
| Goofy text flow around photo |
As well... sometimes you can drag a picture... and sometimes not. I have found it helps to have a bunch of extra line breaks... and you need to see a cursor mark where it is going to insert... It it's a circle with a line through it... not going to work...
Long story short... aligning pictures so text will wrap around it is a big pain in the bear butt! They obviously still have some kinks to work out... But... if you just do centered pictures and type text above and below... like most of us stuffie bloggers... it works fairly well. Mama has a few other blogs she manages with Blogger where she uses left and right aligned pics and this might be a royal pain in the human butt as well!
Labels
This is also a tricky thing... it used to be really easy to add labels, just type them all with a comma between them... But now... there are tick boxes... but... all you have to do is type the labels with the commas between them and make sure you add a comma after the last one. Sort of the same as before, but the long line of possible labels and the check boxes mean it's hard to see if you have labels...

I always double check if my labels came through by looking at the list of blog posts. And... you can always add labels from there as well... by clicking the little label tag when you hover over a blog post in that list... It will also double-confirm what labels you have on that blog...

Scheduling
This works more or less the same as in Legacy Blogger although... there is no "Done" button now and but when you click "Publish" it will double-confirm the date with you... so that is good... except... see the next section...

Publishing
I've had several hiccups with this... I set up a post and had it post-dated to publish in the future... I clicked the Publish command (the sideways arrow) and it asked me...


Moral of the story... always double-check that things are being published for real...
Tables
The other cool thing you can do now is insert a Table (default is 4 col by 2 rows) and then add photos so you have several pics in a row (comme ça)... You can use the Table command to add or delete rows/columns... I guess it might be handy for somethings... You can use the pic commands to make the pics bigger or smaller and/or add captions... if you dare.
 |  |  |
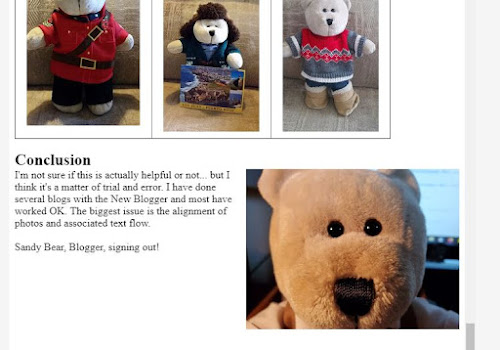
Conclusion

Sandy Bear, Blogger, signing out!
Nope... not quite yet... Added this pic at right... and it did not show up in Preview... sigh...
Why???!!!!!
***Bear thumps head against computer screen***
See... it's there in draft mode...


But not there in Preview mode!!!

I think... it was because I had opened up the blog after publishing it... and made changes... and while it saves it automatically... I had hit Preview before that picture got saved... I think...
This little bear is ready to spit!!! Hopefull they iron out all the kinks and colly-wobbles soon... Is that a word, Beanie Mouse?
Oy vey! I haven't tried the new blogger yet... looks like I need a secrebeary to do it!
ReplyDeleteIt depends... if you want to drag pictures around... prepare to rip out your fur in frustration!
DeleteThis seems doggone complicated. I'd better start studying up...thanks for the introduction Sandy!
ReplyDeleteYup... you're welcome...
DeleteGood to have an IT whizz on hand, though.......... I don't like change either!!!
ReplyDeleteMe neither! But most of us seem to just do centered photos... it's the dragging of photos that's the problem.
DeleteSandy are you going to be able for IT phone support?
ReplyDeleteI can do IT chat support...
Delete